How to create an API (Engine) extensibility project with Visual Studio?
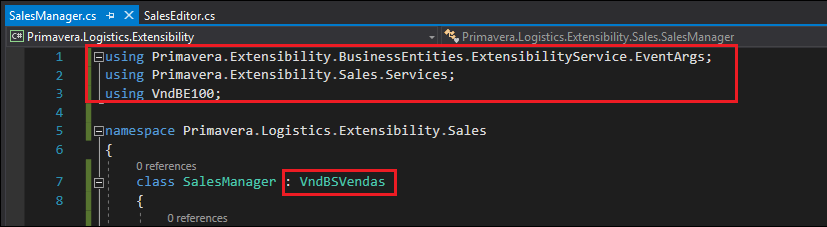
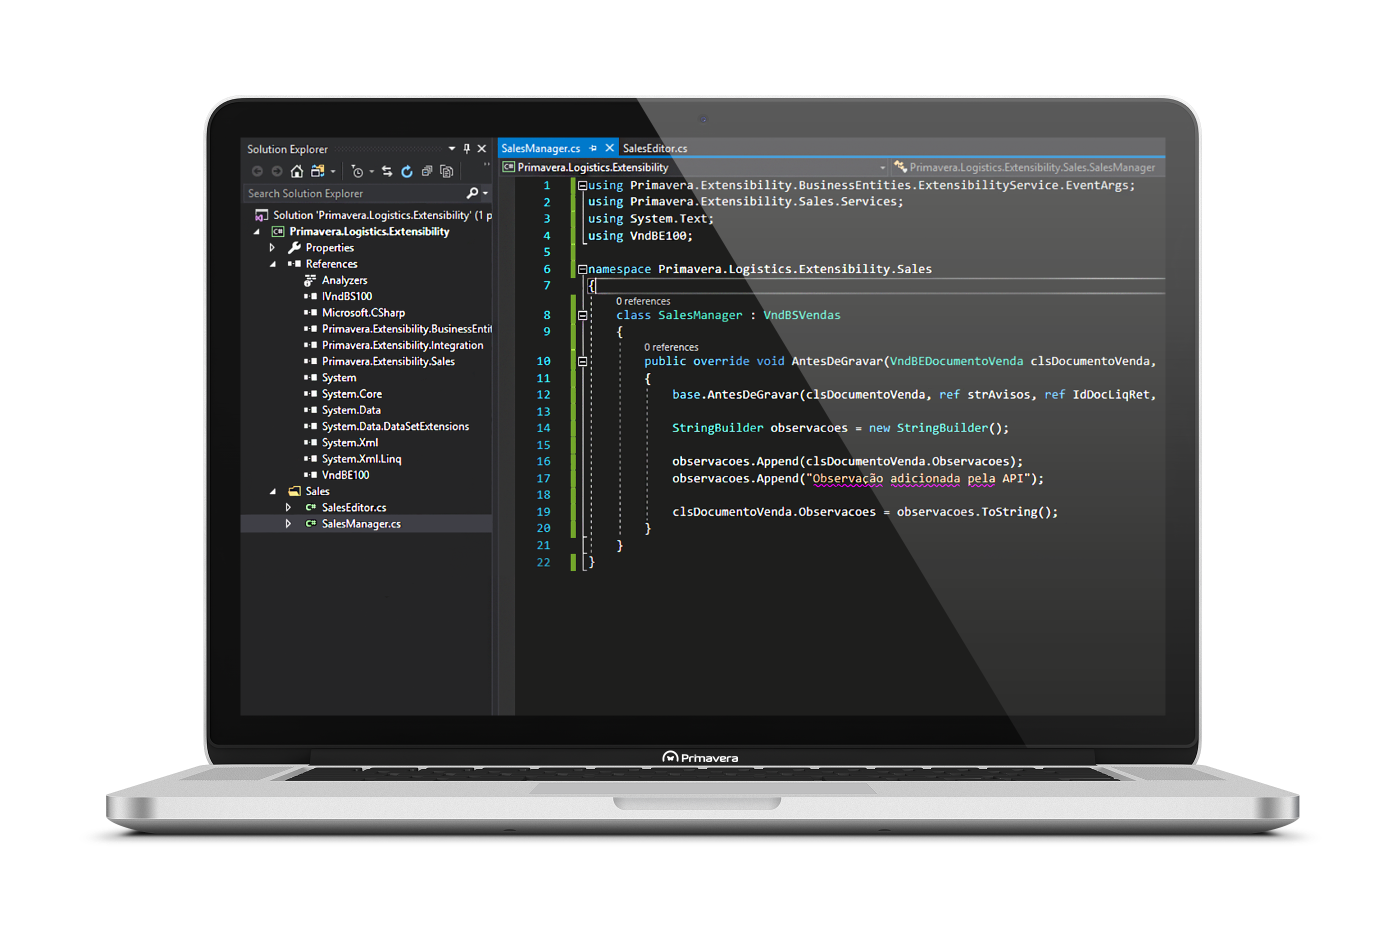
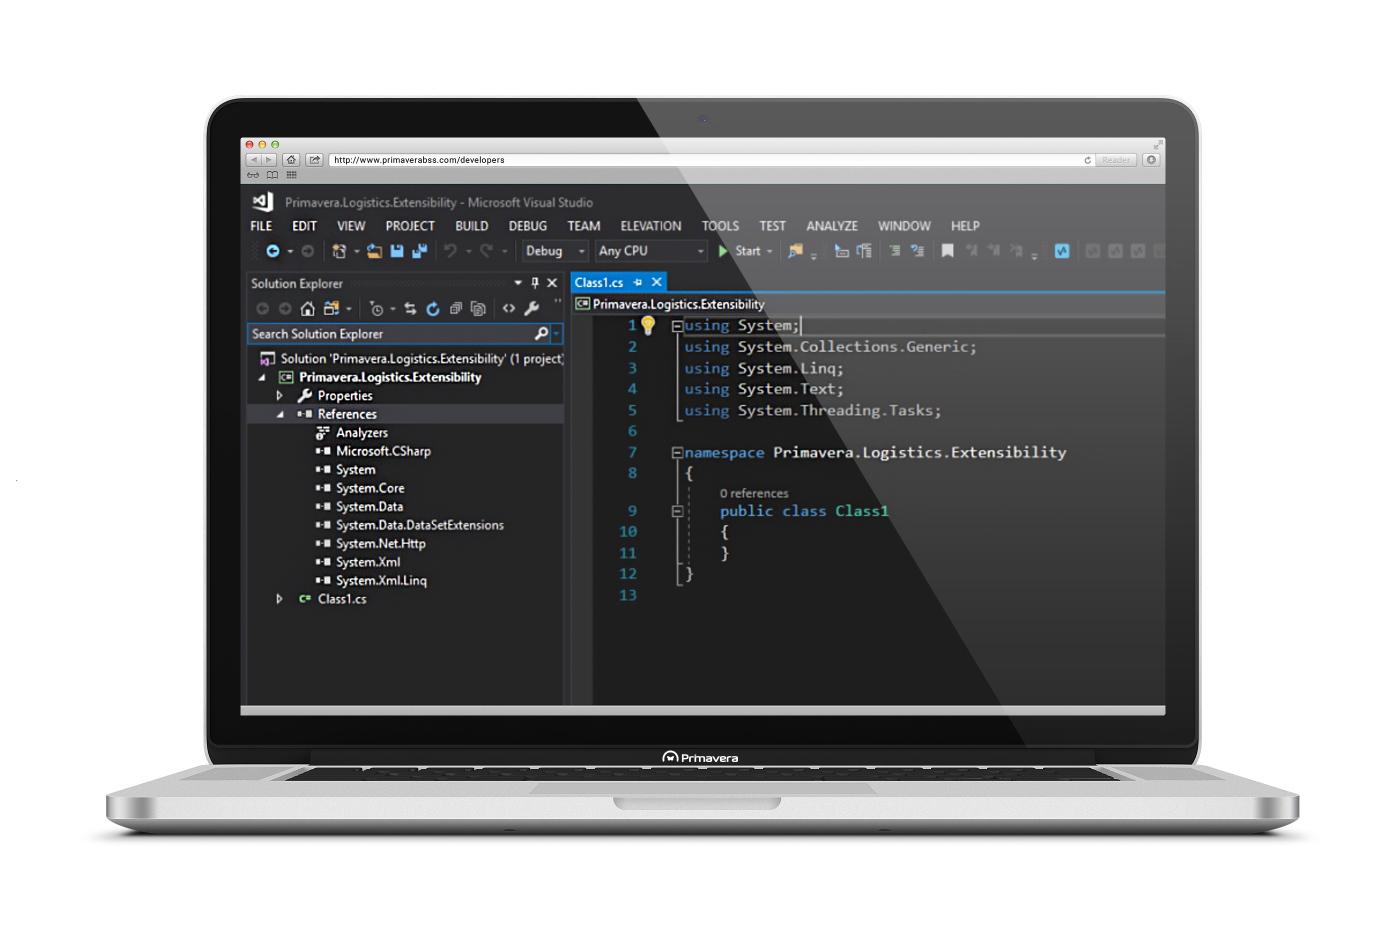
One of the new features of version 10 of the ERP is the availability of events through the API, as it already existed for the interface in previous versions. This document describes the necessary steps for creating your first API extensibility project for the PRIMAVERA ERP. 1 - After opening Visual Studio, select File > New > Project. 2 - From the tree on the left of the displayed window select your development language (C# or VB). 3 - Select the Class Library (.NET Framework) project type. 4 - Assign a name to the 'Primavera.Logistics.Extensibility' project and press OK. At the end of this step your project should look similar to this: After creating the project, it is necessary to add a set of references to the extensibility platform as well as to the modules that you want to work with. Note: All assemblies are located in the 'C:Program Files (x86)PRIMAVERASX100Apl' folder 1 - Rename the Class1.cs class to SalesEditor.cs 2 - Add the following namespaces at the beginning of the class using the using policy. 3 - After the class name add VndBSVendas. This step indicates that our class will inherit all methods, properties and attributes from the VndBSVendas API base class. 4 - In the body of the created class write override and press TAB. A list will be displayed with all the events you can overwrite. In this case, select AntesDeGravar. 5 - Inside the created method, add the code as shown in the following figure: 6 - Compile your solution in BUILD > Build Solution. 7 - Register the assembly as described in "How to Register Extensibility Projects?"Requirements
Step 1- Create the project
Step 2 - References
Step 3 - API Extensibility