How to create an Interface Extensibility Project (PEX) with Visual Studio?
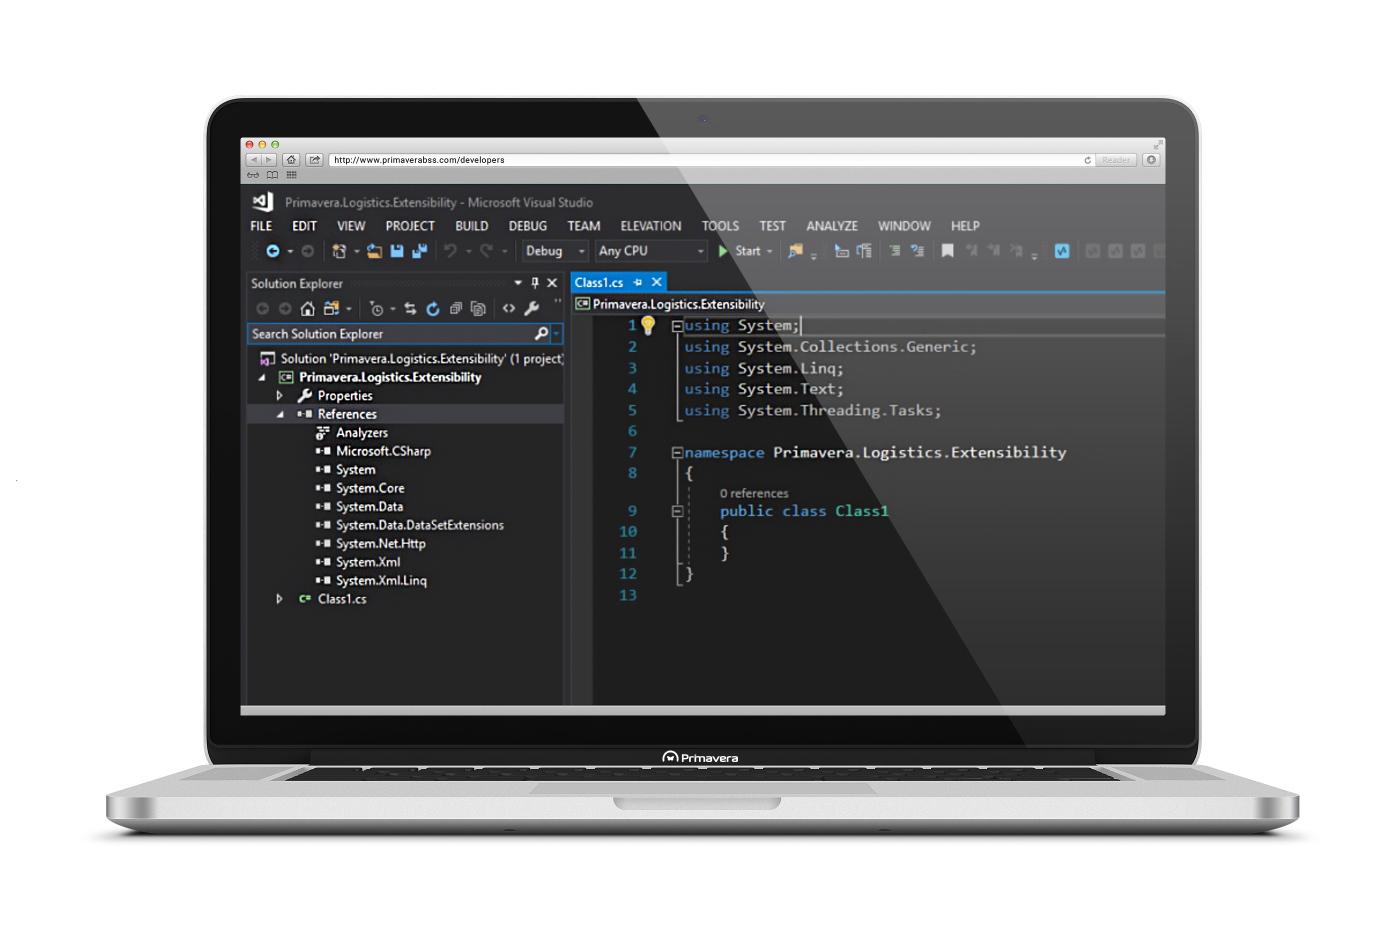
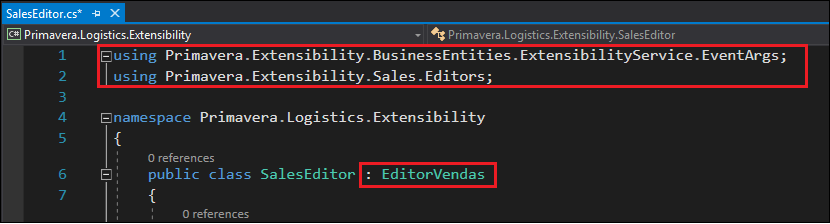
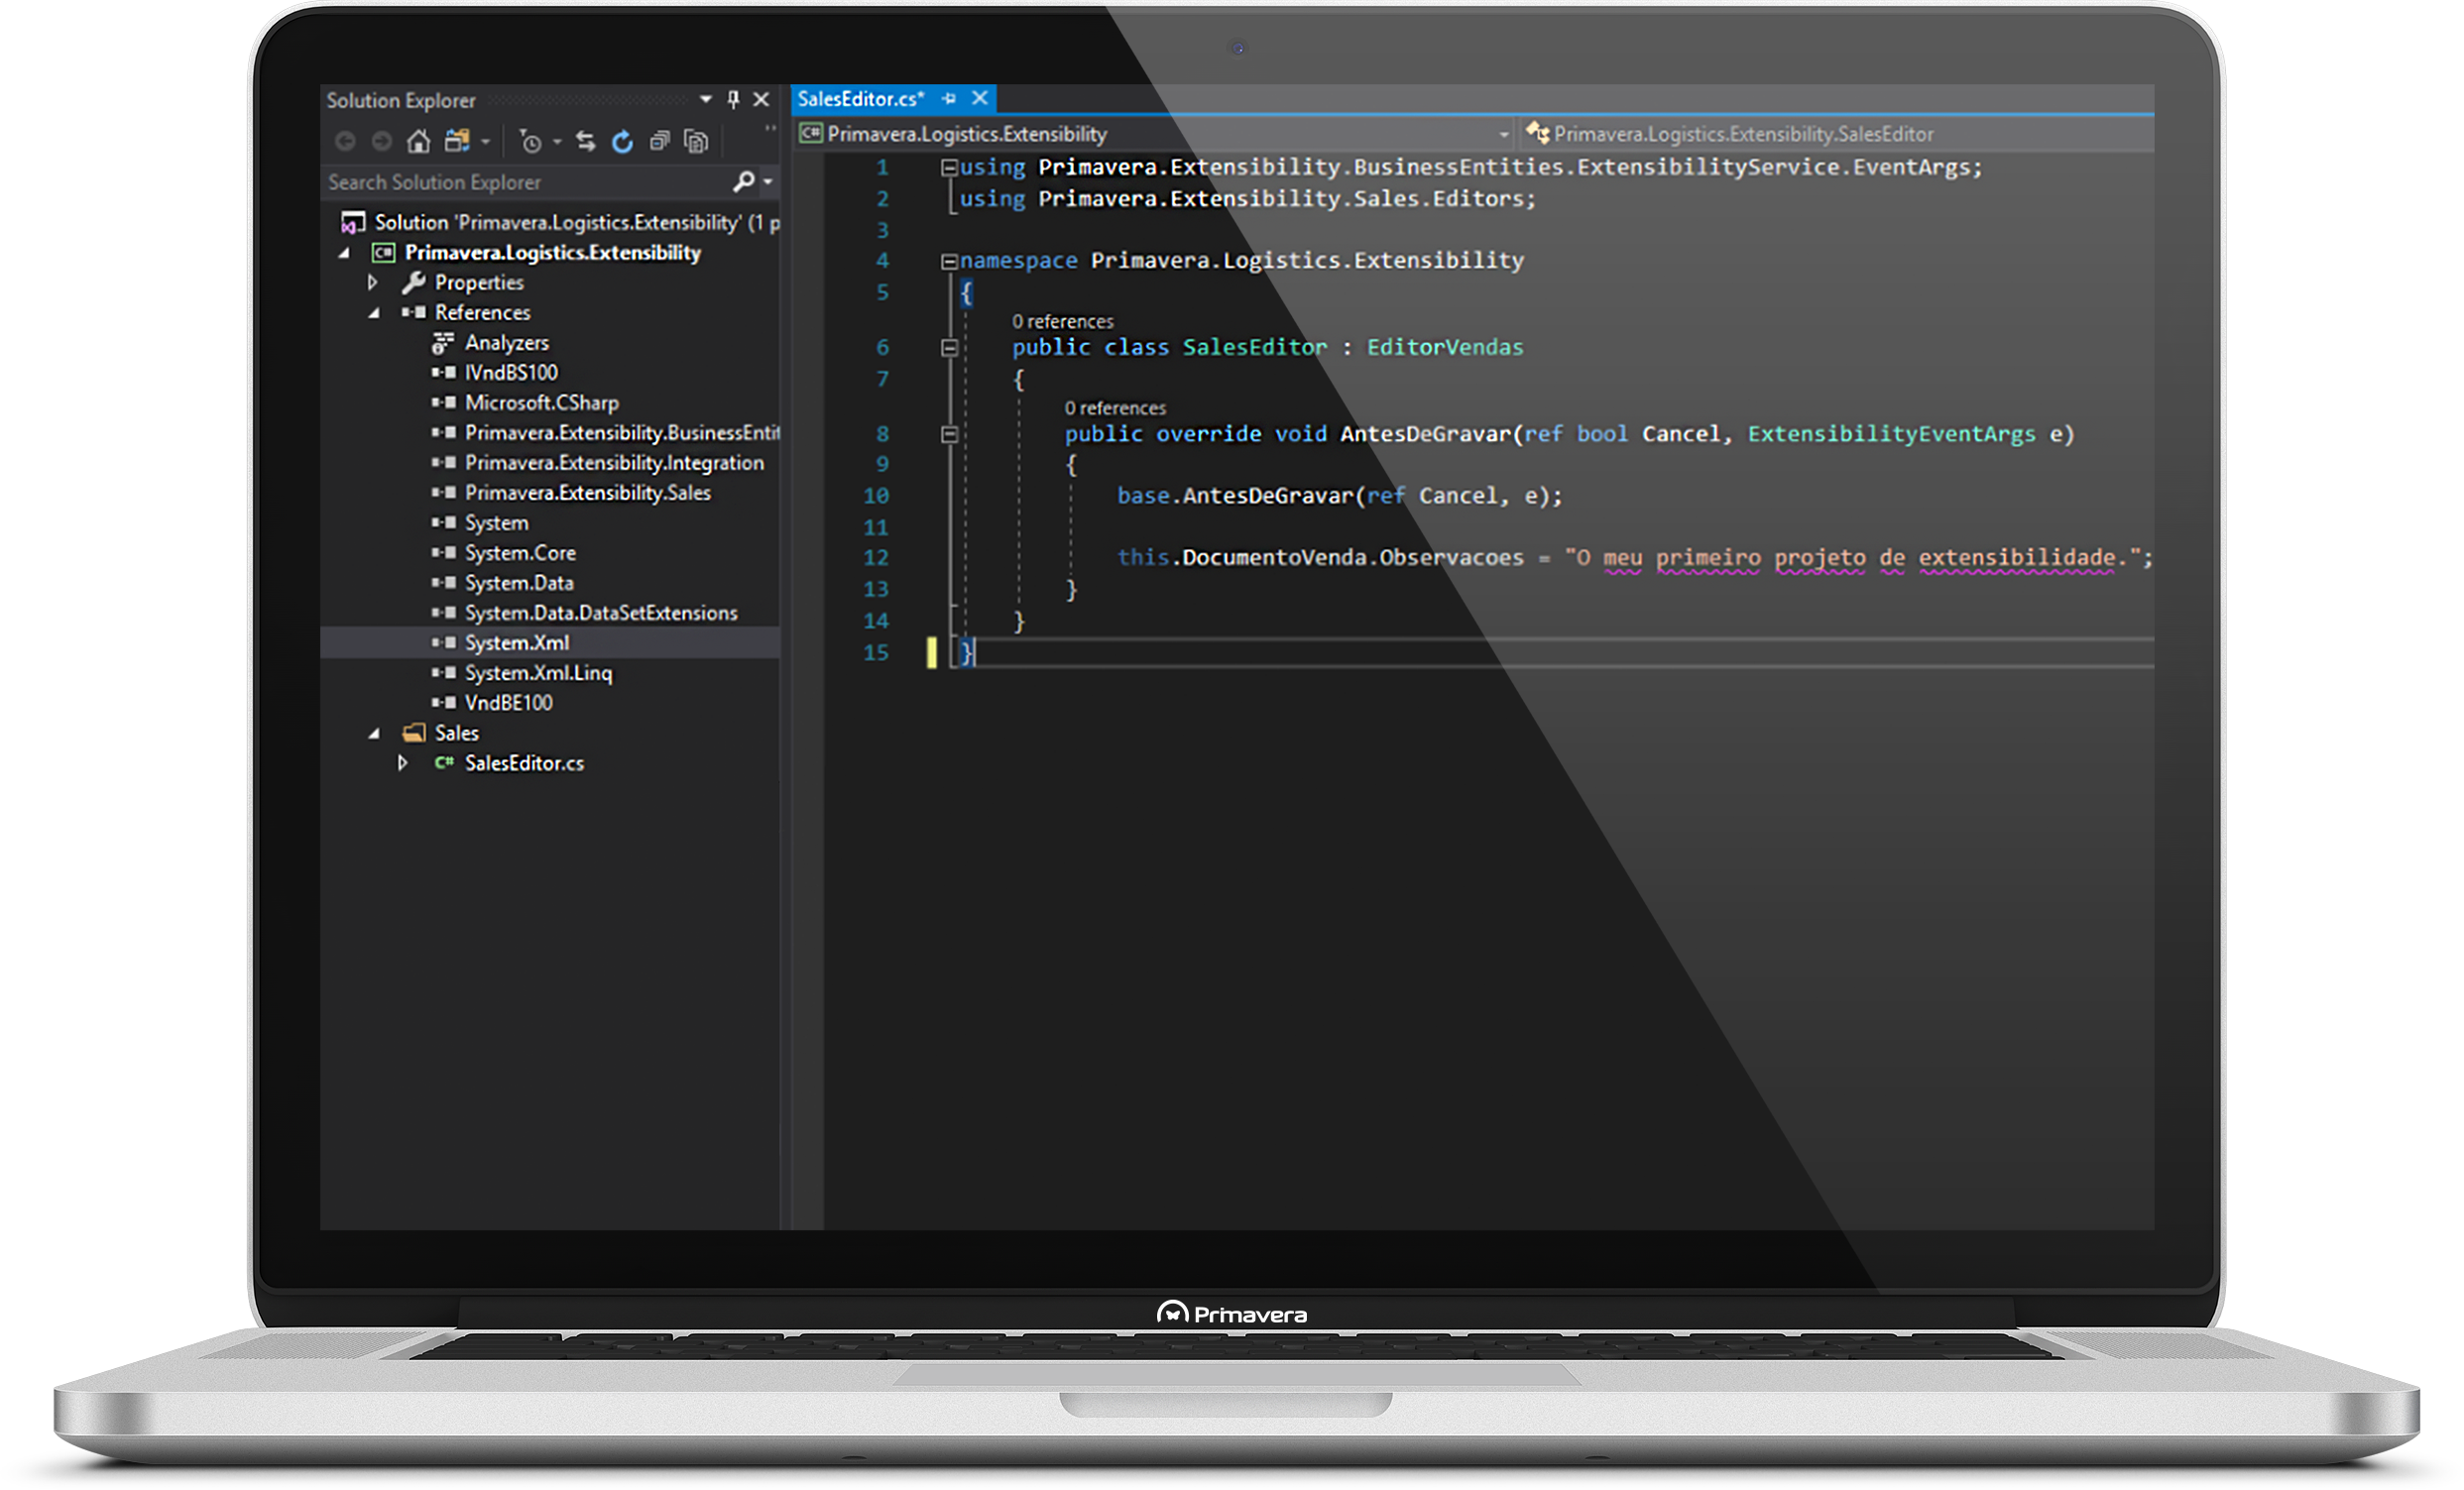
This document describes the necessary steps for creating your first Step 1 - Create the project 1 - After opening Visual Studio, select File > New > Project. 2 - From the tree on the left of the displayed window select your development language (C# or VB). 3 - Select the Class Library (.NET Framework) project type. 4 - Assign a name to the 'Primavera.Logistics.Extensibility' project and press OK. At the end of this step your project should look similar to this: Step 2 - References 1 - After creating the project, it is necessary to add a set of references to the extensibility platform as well as to the modules that you want to work with. Note: All assemblies are located in the C:Program Files (x86)PRIMAVERASX100Apl folder. Step 3 - Interface Extensibility 1 - Rename the Class1.cs class to SalesEditor.cs 2 - Add the following namespaces at the beginning of the class using the using policy. 3 - After the class name add EditorVendas. This step indicates that our class will inherit all methods, properties and attributes from the EditorVendas class. 4 - In the body of the created class write override and press space. A list will be displayed with all the events you can overwrite. In this case, select AntesDeGravar. 5 - Inside the created method write the following line of code 'this.DocumentoVenda.Observacoes = 'My first extensibility project.'. This instruction will modify the value of the remarks property of the VndBEDocumentoVenda object. Your project should now look similar to the following figure: 6 - Compile your solution in BUILD > Build Solution. 7 - Register your assembly as described in "How to Register Extensibility Projects?"